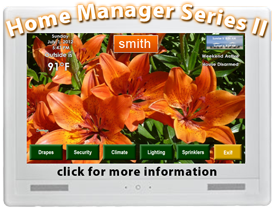


Establish Lighting Schedules
The lighting and appliance control capabilities of the Home Manager are significant and typically under utilized by a large number of users. The capabilities that it has in controlling lights are almost limitless. We encourage all users to explore the capabilities and take advantage of them in automating the lighting in your home which is systematically turned on and off and predictable times.
There are two phases to establishing control of lights. The first phase is to establish or define the light in the Home Manager. The second phase is the establishment of desired schedules and control criteria for those lights that have been previously defined in the system.
At the DIRECTORY, press LIGHTING & APPLIANCES. At the top of the Lighting & Appliance screen, press PLC GROUPS. At this point you decide whether you are going to establish and define a new light or modify/add schedules to an already defined light.
To define a new light, press the DEFINE ….. button on the right. Then press the group in which you want the light to be a part of on the left side of the screen. Select the module you wish to use and then enter a name for that module. After entering the name, note the letter and number code assigned to that module. This will be the code that must also be present on the physical light switch to be controlled.
Within the entire DEFINE….. section, you can create new lights, edit existing names and change module codes if desired. When you have completed all your amendments in the DEFINE ….. section, return to DIRECTORY and LIGHTING AND APPLIANCES to enter schedules for your new light.
Press the PLC GROUPS button on top of the screen if it is not already highlighted. This time, press the SET UP SCHEDULES button on the right. Select the group and particular module on the left that you wish to add schedules to. Upon pressing the particular module (light), you will be presented with the scheduling screen. The screen has the potential of displaying up to three schedule summaries. If no schedules currently exist for the light, the first schedule summary box will contain ‘Next Schedule’. That is your invitation to press the schedule summary box and create the first schedule. Upon pressing the box, it will expand into the scheduling screen to allow you to enter all the detailed information desired for your new schedule.
On the leftmost side of the screen is where you create the ‘ON’ event. The center of the screen is where you will create the ‘OFF’ event and on the rightmost side of the screen is where you can establish and conditions that must exist for the ‘ON’ event to occur.
Starting on the left with the ‘ON’ event you can choose to have the light turn on at a particular time or upon a particular condition. The available conditions include any of your security sensors opening or closing, any temperature sensors reaching a particular temperature, the pressing of a particular number into a keypad or the occurrence of one of the available ‘Special Events’ which include arming the security system, fire alarm activation, sunset and sunrise.
Select either the TIME or CONDITION button to begin the selection process. Press the button to the right of your selection to continue the process. Navigate to your choice and press ENTER. Press the ENTER MODIFIED CONDITION until you return to the scheduling screen.
In the center section of the screen, establish when you want the light to go off in a similar manner as you did in establishing when it goes on. You have the same choices, plus you have the option of having the light turn off after a particular duration. Navigate through the choices, eventually entering your desired choice and pressing the ENTER MODIFIED CONDITION until returning the scheduling screen.
If you want to add any conditions to the schedule, proceed in creating the conditions by selecting the RESTRICTIONS box on the right. Navigate through the options until you have selected and entered the desired conditions that must exist during the ‘ON’ event in order to have the light come on. An example of a condition application is a light that may be scheduled to come on everyday at sunset and go off at 11:00 pm except when the owners are away. The condition that would indicate the owners are away is ‘whole system armed’ in the ‘Special Events’ area. If this condition is in the ‘Restrictions’ portion of the schedule, then the light will only come on at sunset when the system is armed in the ‘away’ mode.
After you have your ‘ON’, ‘OFF’ and “RESTRICTIONS’ established for the light, press the ENTER MODIFIED SCHEDULE on the right to fully enter all the information. This will return you to the initial module screen where you can view the schedule summary for this light. Note that a new box has been created to its right that invites you to select it and create another schedule for the same light. You can create up to six schedule for each light.
A schedule is not required to include both an ‘ON’ event and an ‘OFF’ event. It could just include one or the other. Sometimes its beneficial to have just an ‘OFF’ event that would assure a light would go off at a particular time or condition regardless of how the light got turned on, either automatically or manually at the switch. An example of this would be having a schedule that would turn a light off when the security system is armed. This way, every time the security system is armed, the light would go off. If you had this schedule in all your lights you’d never have to go through your house turning off lights before you leave.
Through the creative use of multiple schedules and common schedules among multiple lights you can create just about any level of control that you would like to achieve.